The Making of “Table for Two”
In this post, I'll share the story of how “Table for Two” came to be — including how close it came to not happening at all. I'll be taking you through the full creative process: concept development, site scouting, prop assembly, shot planning, field shooting, digital editing, and print proofing.
If you're happy to simply appreciate this photo as a romantic work of art, and don't want your illusions shattered, then maybe this post isn't for you, because the actual story of this shot is anything but romantic.
But if you're curious, and want the curtains peeled back to reveal all the gory details, read on.
Concept Development
First, some context. This photo was taken in May 2020, during the COVID-19 pandemic. With travel shut down, I was working on a series of landscape photos taken in the Alachua Sandhills, a scenic area of scattered forests and rolling hills near my home in Gainesville, Florida.
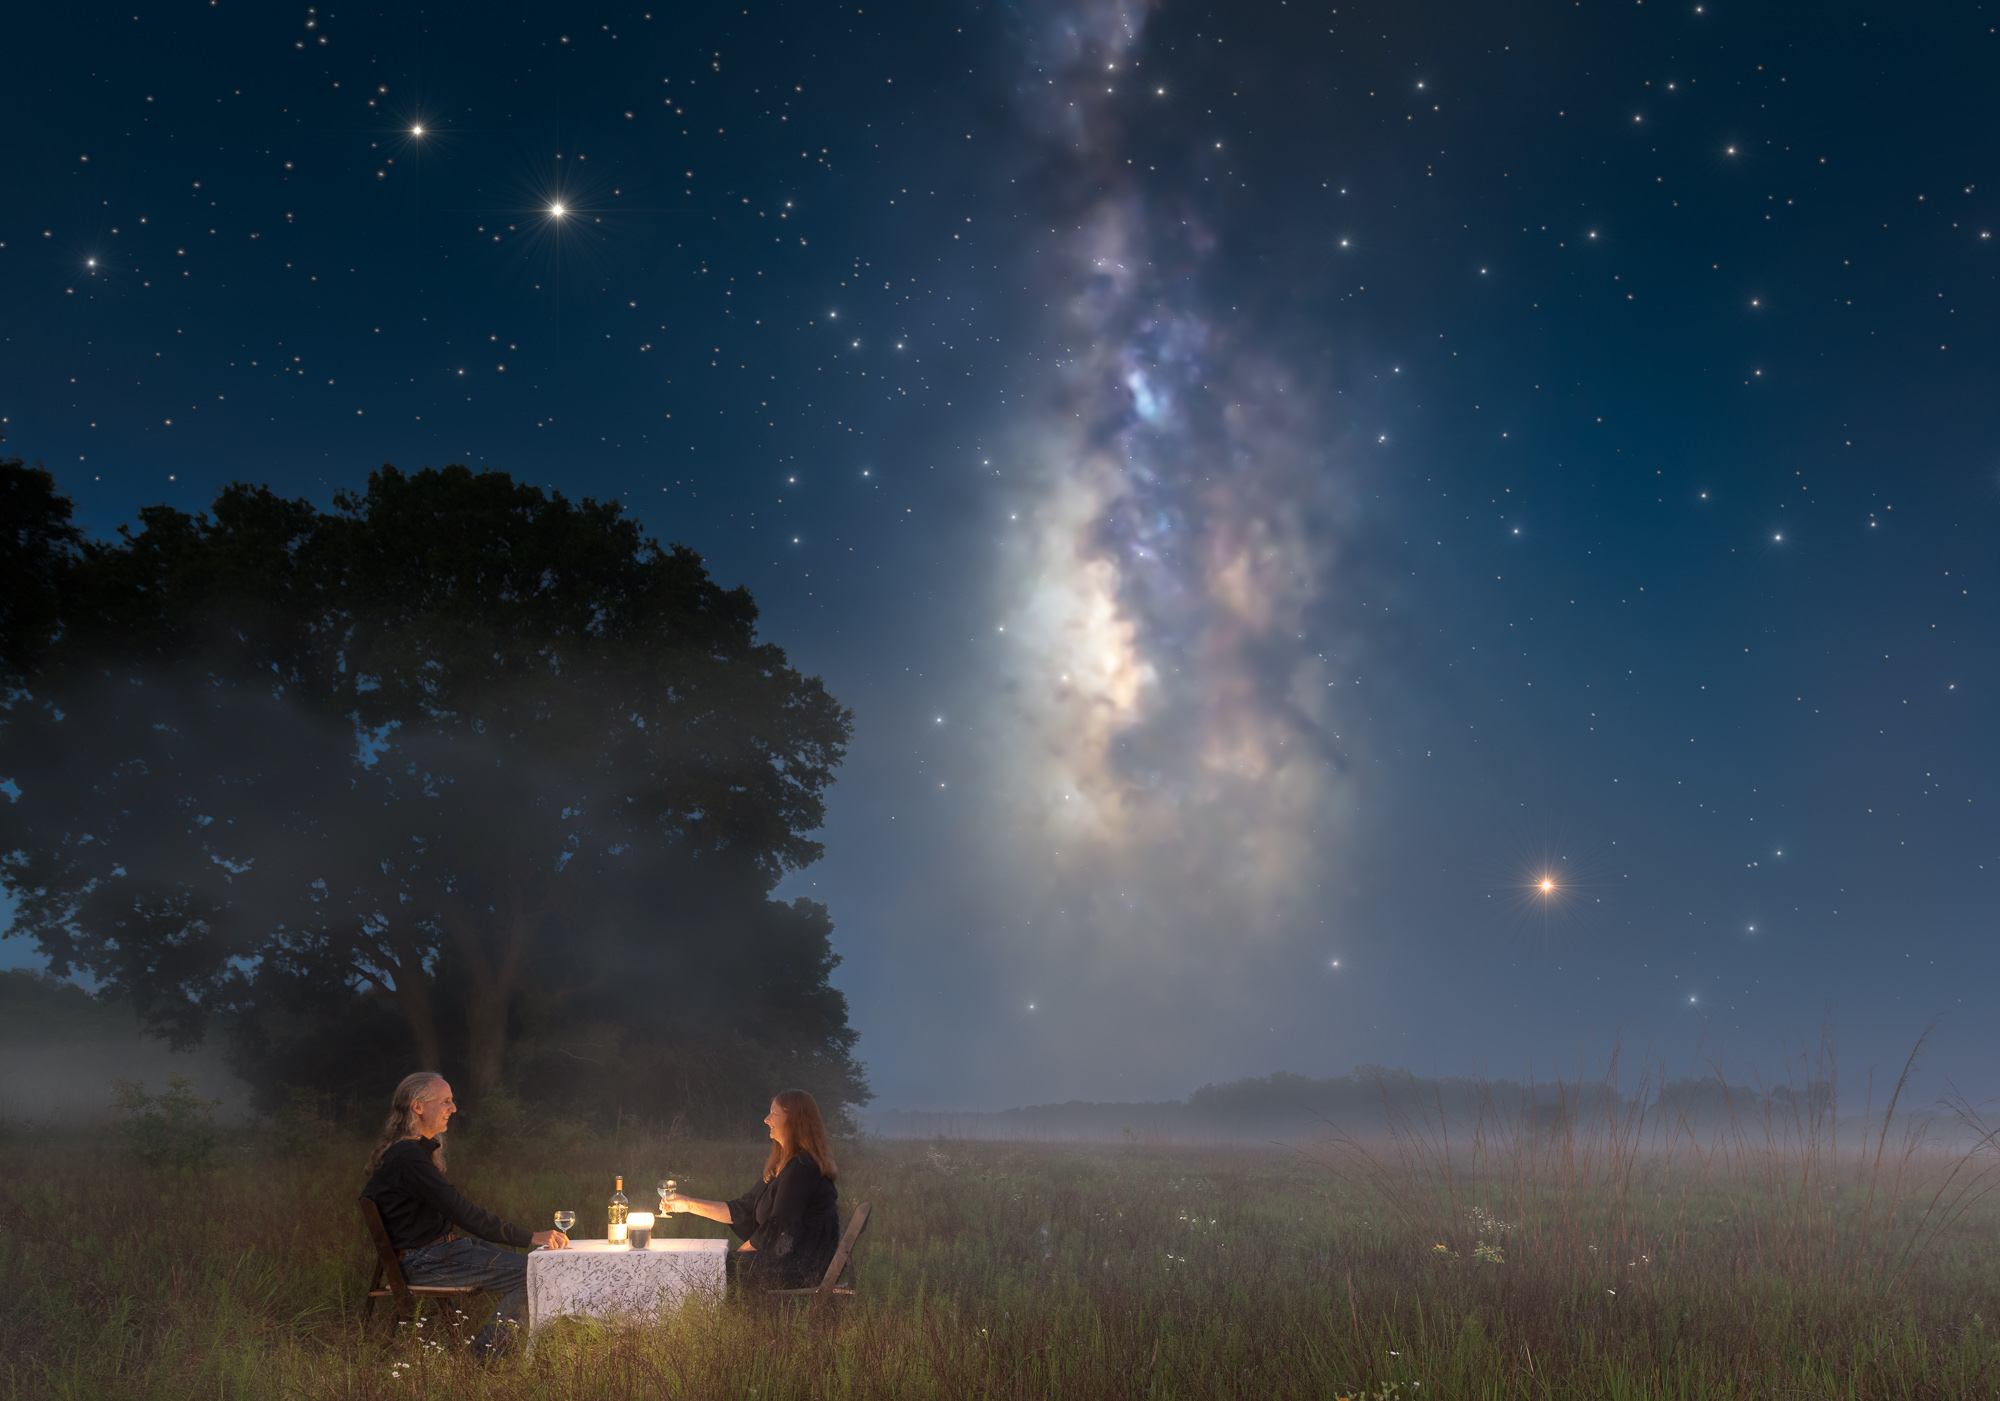
I wanted to create an image commemorating the pandemic, and in particular the idea of social distancing, so prominent at that time. An idea vaguely formed: a surreal photo of formal dining in a remote meadow under a sweeping night sky. It would be an ode to extreme social distancing, both in space and time. The concept, and the title of the photo, was inspired by the “Table for One” pandemic-era restaurant in Sweden.
When considering a night shot, the first step is always the same: run Stellarium, a planetarium program, and see what's going on in the sky. I was especially interested in the Milky Way, which Stellarium showed would dominate the southern sky before dawn in May.
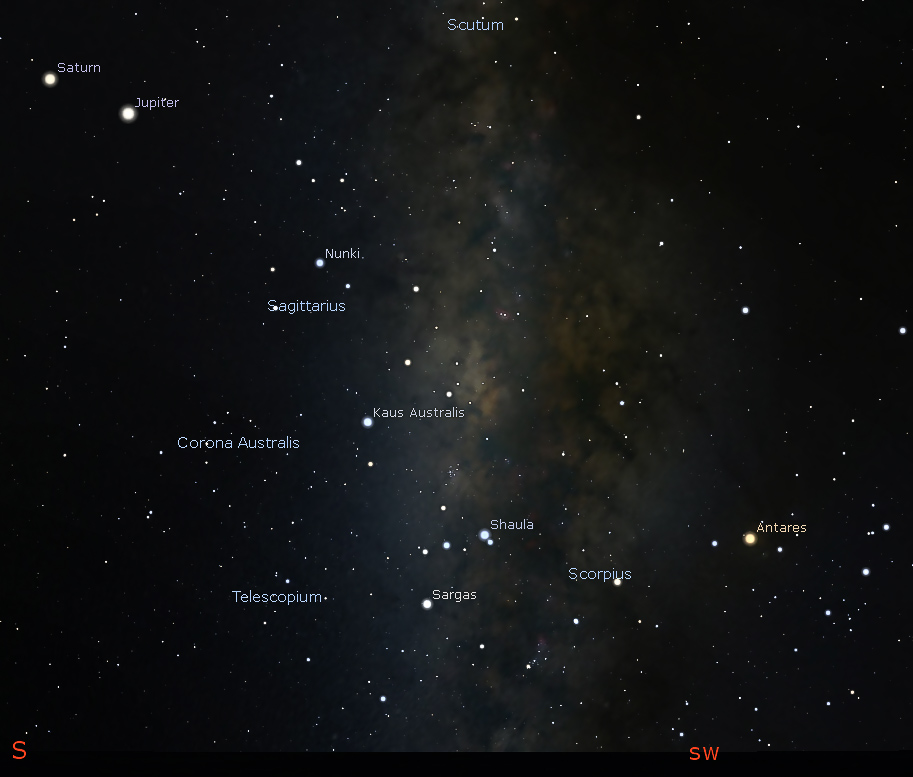
Stellarium also showed that the constellation Scorpius (including the red star Antares) would snake along the horizon, and a pair of bright planets, Jupiter and Saturn, would be high and to the east.
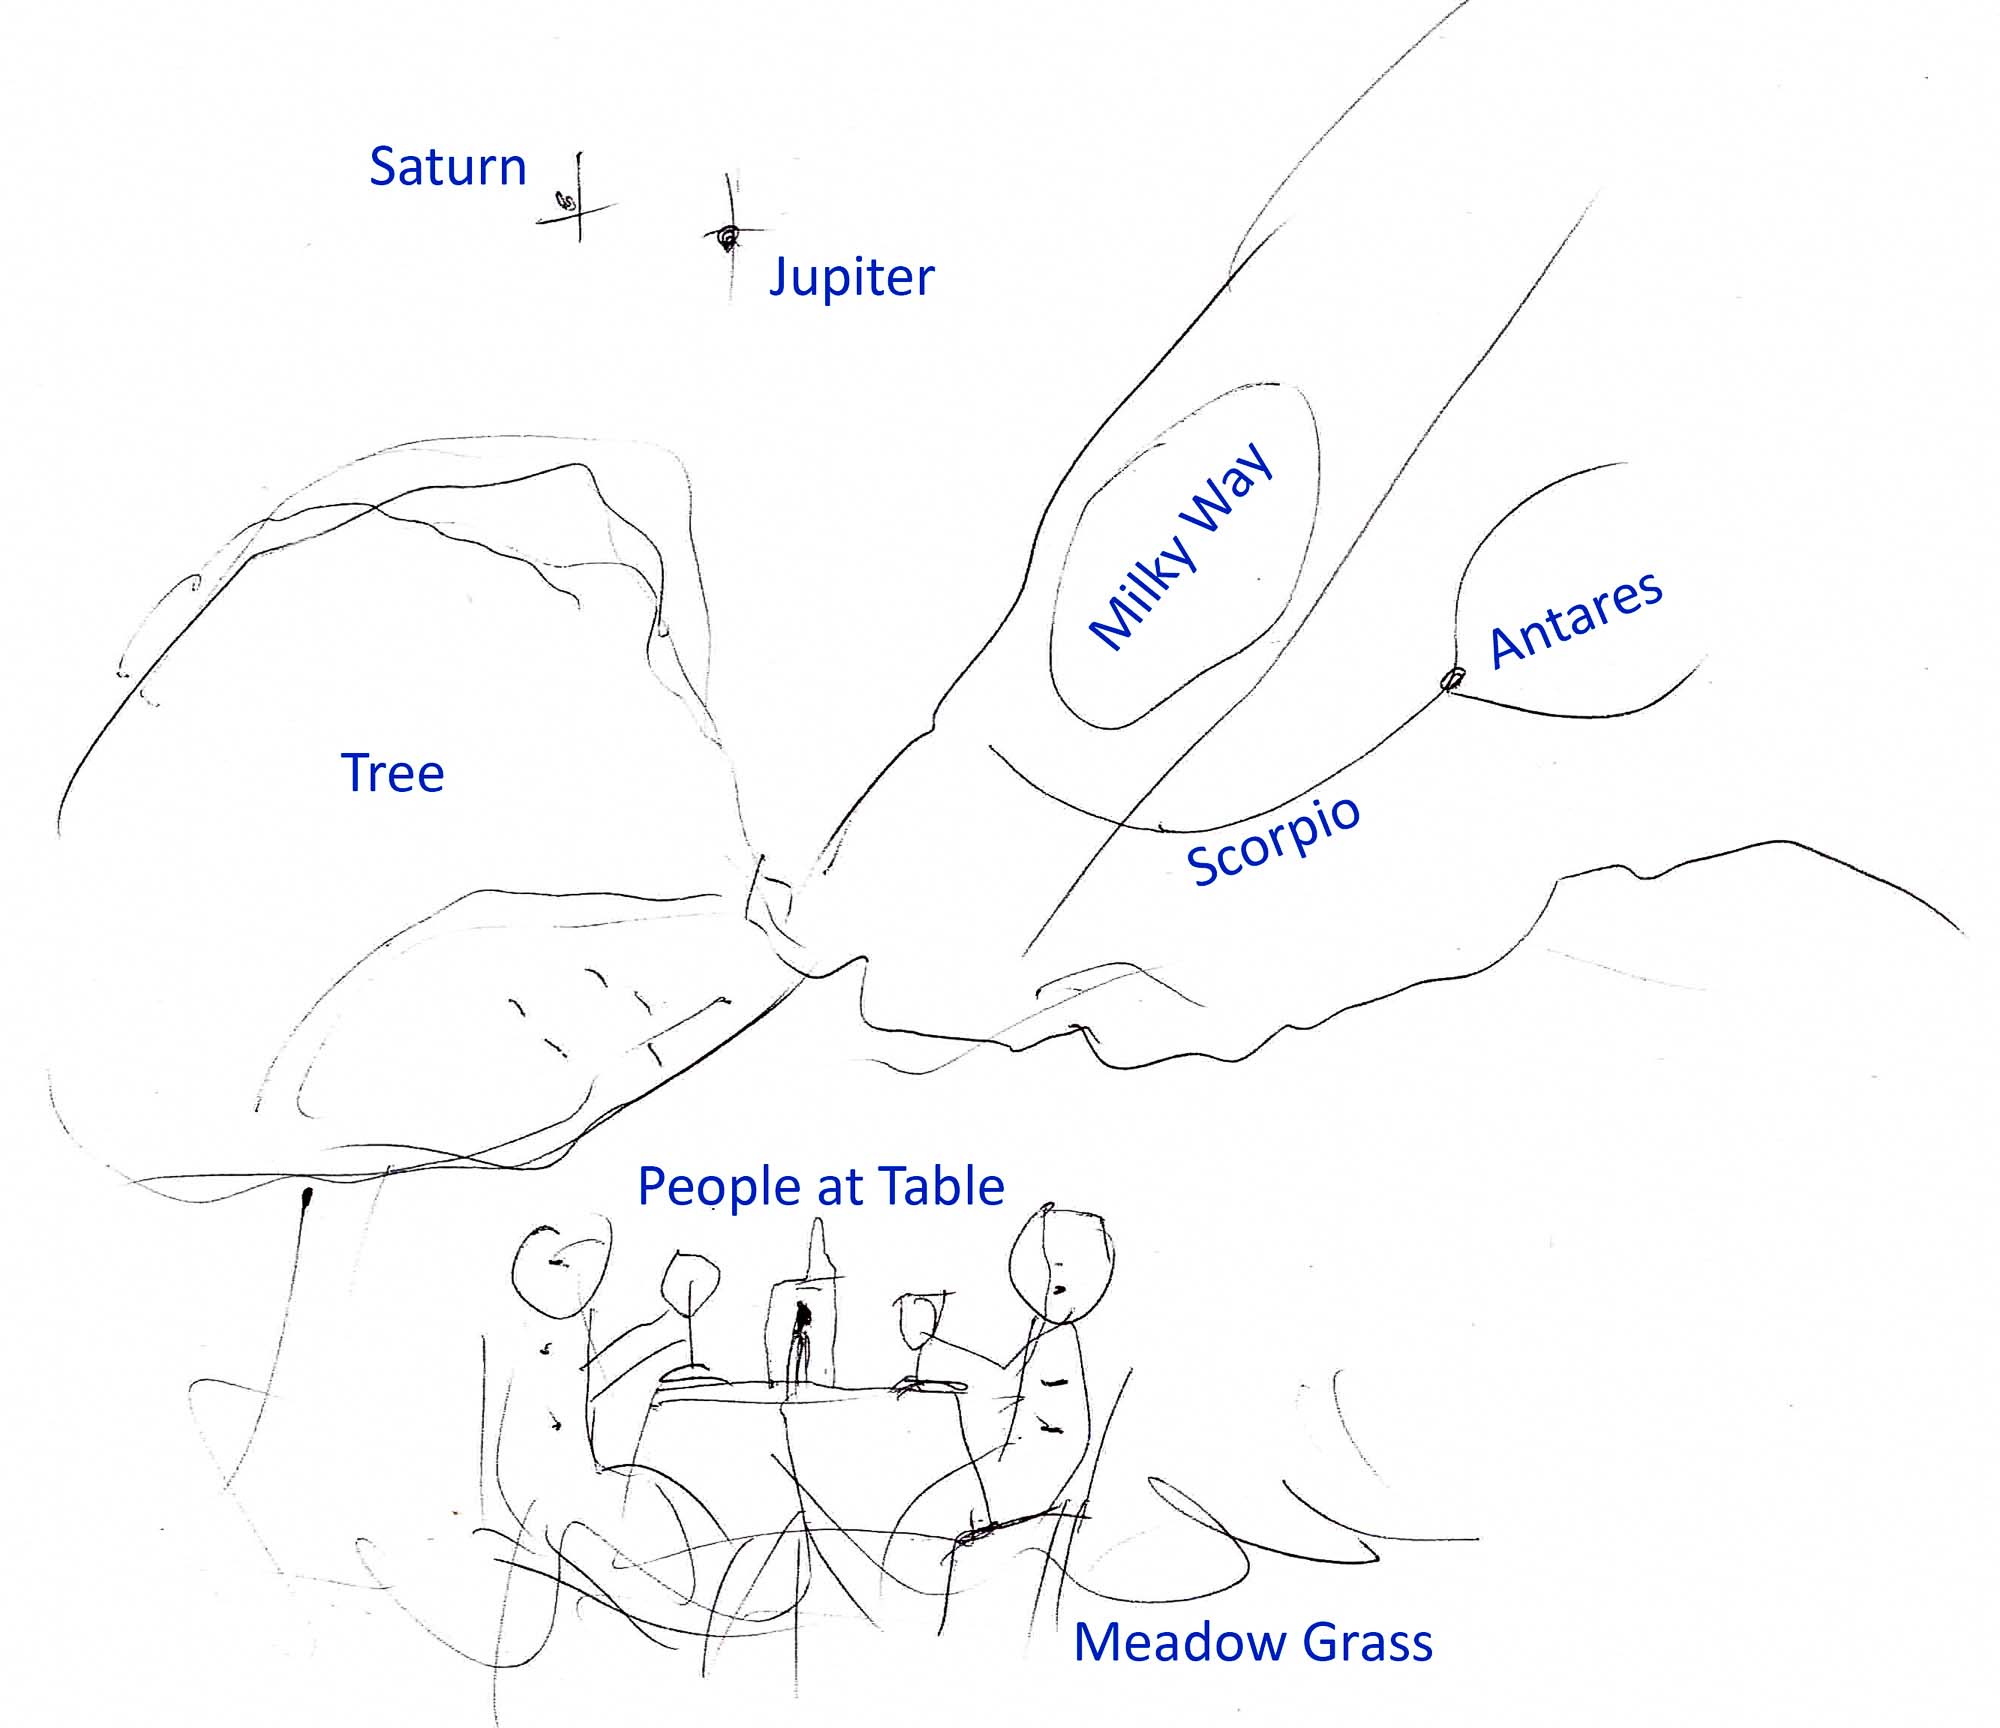
The following concept development sketch, done in early May, shows a rough idea of how the elements in the sky could fit with my idea of a table in a meadow. I imagined a photogenic tree filling the dull space below Jupiter (sorry, Corona Australis — you need brighter stars), and possibly another smaller tree rising up to the right of Scorpius.
Site Scouting
With a rough idea of the shot layout, I now had to find a suitable location. The site criteria were:
- A photogenic tree to fill the left part of the photo.
- An open area to the right of the tree, with the sky visible to near the horizon, where Scorpius will be located.
- An area of pretty, knee-high grass in front of the tree, where the table will be located.
- Optionally, something of reasonable visual interest (maybe another small tree) to occupy the lower-right corner of the photo.
- A location within reasonable hiking distance of a road.
This had to fit together with the location of the various celestial objects. I created a sheet showing the rough coordinates (the azimuth, or compass direction measured in degrees east of north, and the elevation, measured in degrees above the horizon) of objects of interest.

Jupiter and Saturn would be 39° above the horizon, so from the point of view of the camera, the tree, to avoid crowding, shouldn't be higher than about 35°. The open area at the horizon should extend from about 190° to 235° of azimuth.
The chart at the top of the sheet lists the field of view at various lens focal lengths. Note that the horizontal field of view using a 70mm lens is about 29°, so if I mounted that lens, turned the camera vertically, and placed the horizon at the bottom of the frame, the top of the frame would roughly mark the desired elevation of the treetop.
For measuring azimuths, I used the compass app on my iPhone. It was accurate enough, as these measures didn't need to be exact. There was some wiggle room in this shot.
I began searching the Alachua Sandhills, looking for the right location. This spot…
…had simply beautiful grass — back-lit, it would just glow. But the little tree in the foreground would extend up into Scorpius, and if I moved enough to get it out of the way, I'd be out of the nice foreground grass.
This spot…
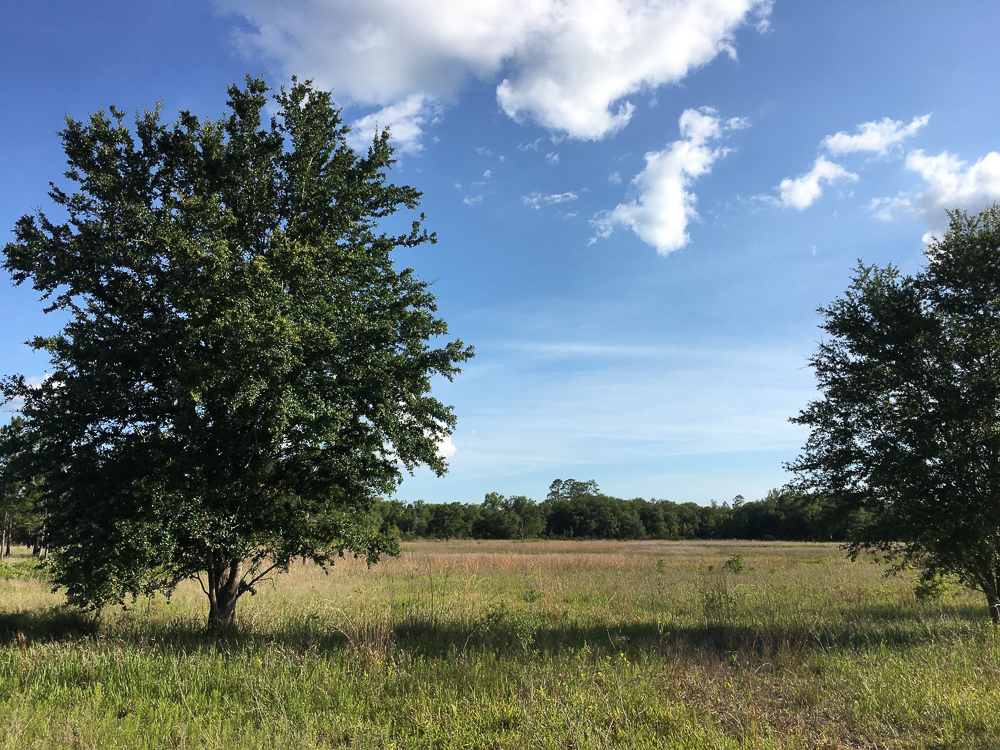
…would work. The left tree was about the correct size and shape, and an area of open sky for Scorpius was bounded by another tree on the right. The meadow grass wasn't ideal, however — a bit short and sparse.
At one point, I saw a promising tree in the distance, but it was well guarded by prickly blackberries. After struggling for 20 minutes or so, searching for a path through, I looked at my bleeding legs and decided that no, walking through here in the dark was just not going to work.
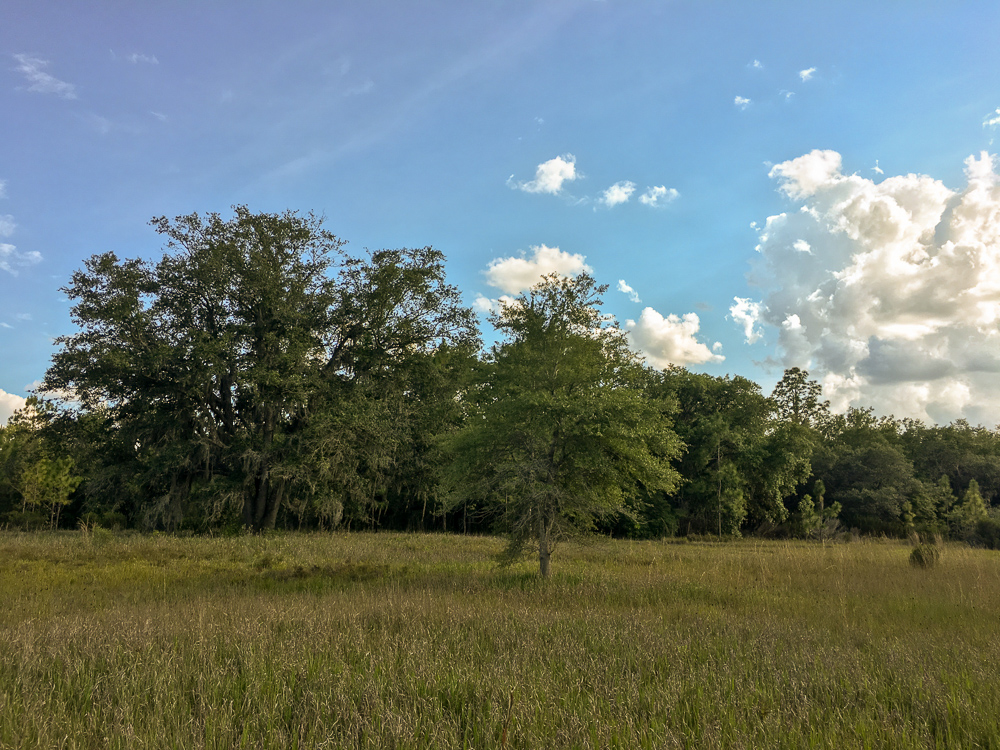
Finally, I found this spot.
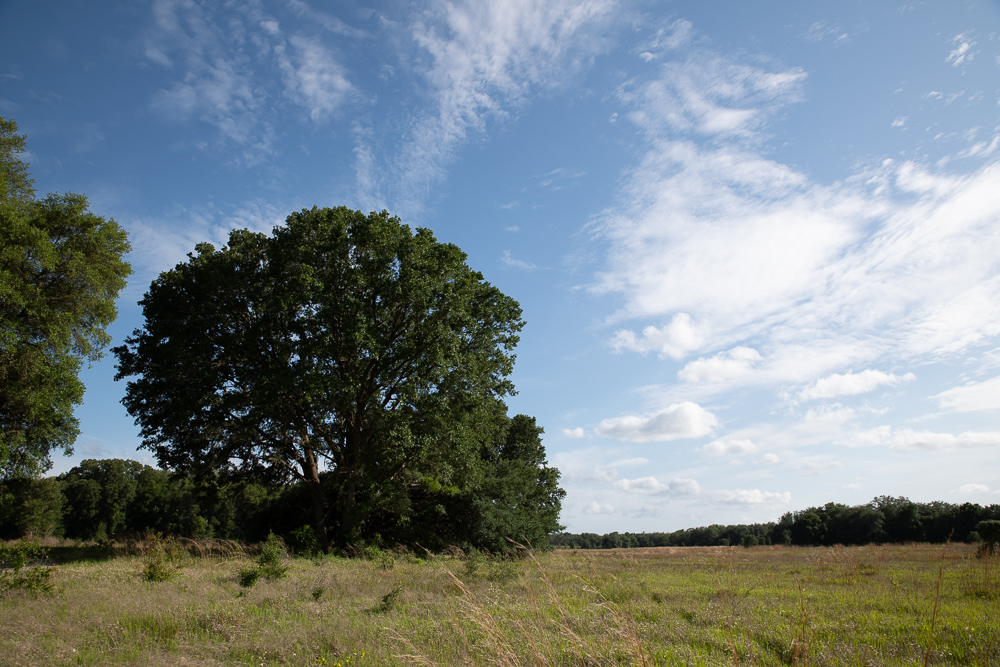
Photogenic tree on the left? Check.
Open area of sky for Scorpius? Check.
Nice foreground meadow grass? Check.
Distance from a road? About a 15-minute hike. Check.
The one thing this spot didn't have was a smaller tree on the right. But there were clusters of tall dry grass that could fill that role.
As a plus, the big tree had an extensive shadowed area underneath that would make a nicely-contrasting dark background for the lantern-lit people.
A few measurements confirmed that yes, this was the place.
Prop Assembly
Initially, I considered staging a full formal dinner, with plates, silverware, napkins, and food. But the idea was for the table to be a small part of the shot, dwarfed by the sky, and I worried such a complex setting would get lost at such a small scale. So I settled on a sparser table setting: a bottle of wine and glasses.
The rules on alcohol are a bit ambiguous at the location I'd selected, so to play it safe, I created a bottle of prop wine.
I initially envisioned red wine, with the bottle in front of the lantern, lit up and glowing a deep ruby red. But in tests at home, it just didn't look right. If the prop red wine was thin enough to let light through, it looked more like fruit punch.
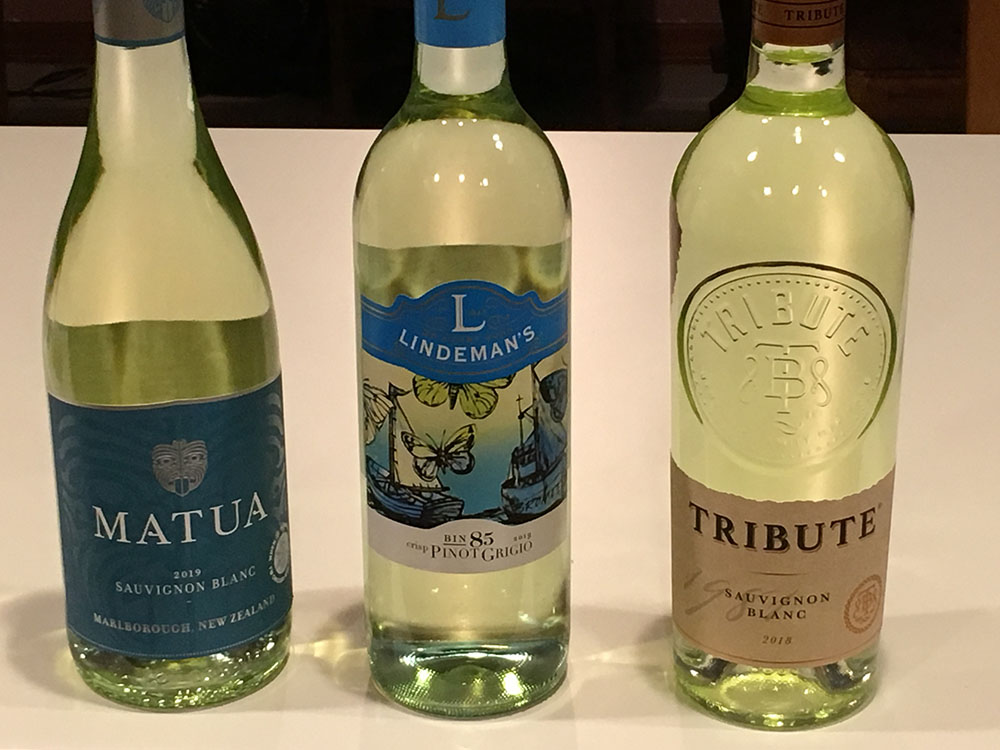
So I settled on white wine, with the bottle located behind the lantern and front-lit. I used a bottle with a textured logo molded into the glass, to add some visual interest. I set out to create a convincing white wine replica using food coloring. One drop of yellow and two of green, in a couple liters of water, worked well.

The chairs were ordinary folding chairs, which, although wood, were quite light. The wood seemed appropriate for an outdoor setting.
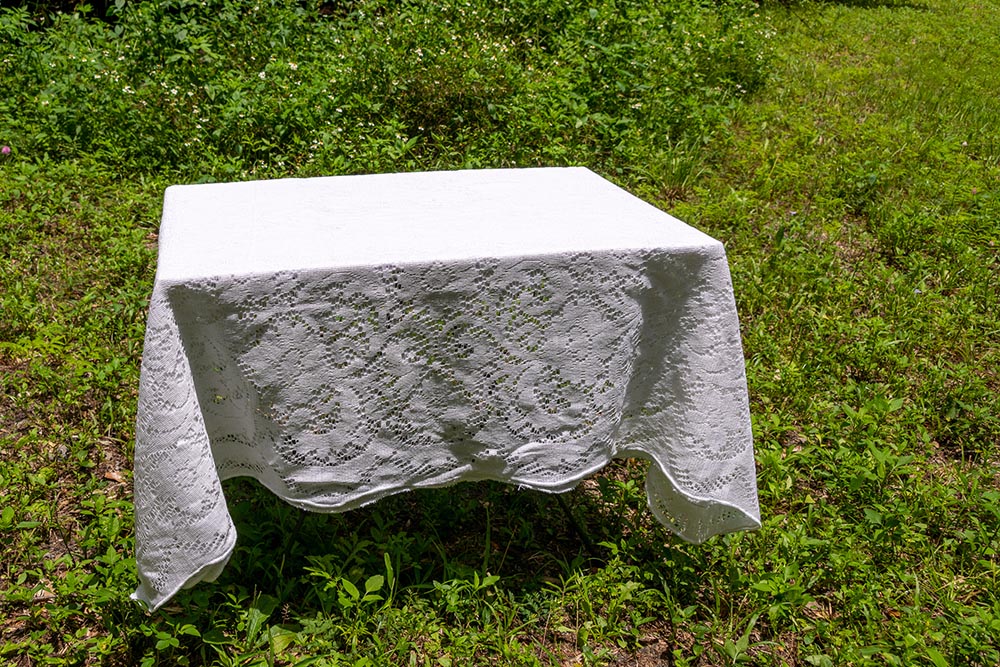
The table was problematic. There's no way I could carry an actual table to the site, so I constructed a prop table from scrap foam board. Attached was an Arca-Swiss plate for mounting on a tiny hiking tripod.
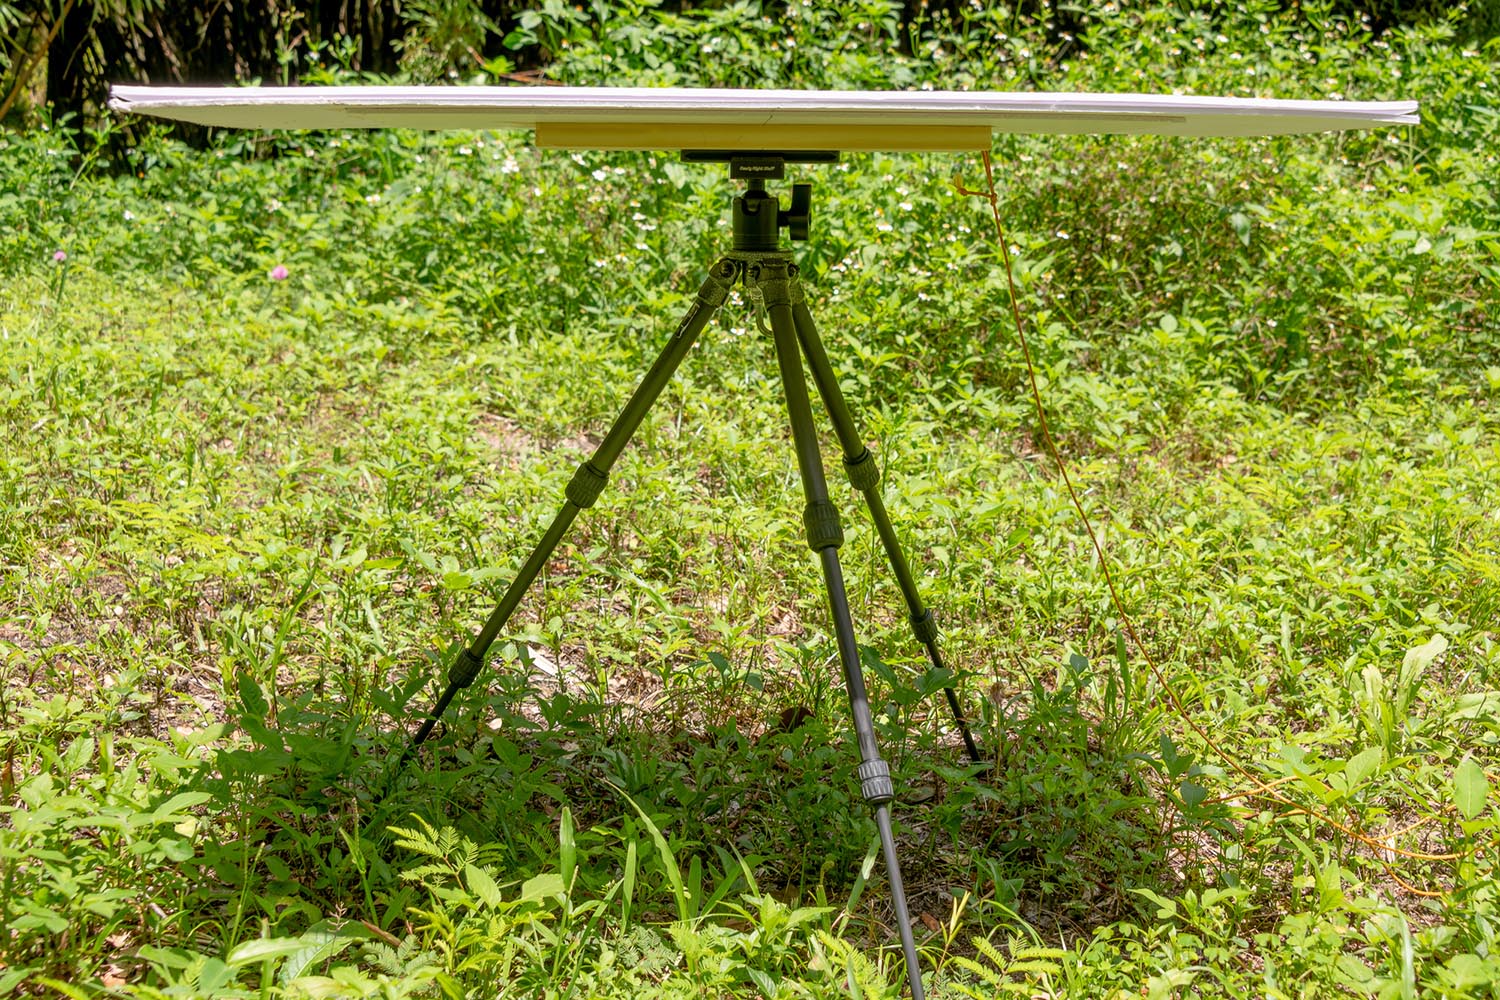
The table wasn't especially strong nor stable — the wine bottle had to sit near the center — but it worked well enough. Covered with a lace tablecloth, you'd never know it was a prop.
In an ideal world, the table would be lit by candles. But given the dry grass where the shoot would occur, candles were out of the question.
So I used a battery-powered camping lantern, sitting on a stainless steel mug. It looked nice, giving a romantic glow, but wasn't bright enough, so a second, more-powerful camping lantern sat hidden behind the first, turned upside-down so it's light would be directed up at the people sitting at the table.

For wardrobe, semi-formal black long-sleeve tops were selected. The long sleeves were for mosquito protection.
Two wine glasses with robust stems completed the props. They were carried to the site in a camera backpack, nestled in foam-lined compartments that would normally cradle delicate lenses.
Spousal Buy-in
“Table for Two” is a self-portrait; I'm the male in the shot. The female is my wife, Fiona.
Initially, I considered doing this shot with two people (a romantic shot), with one person looking up at the sky (an awe-of-the-heavens shot), and even with no people — just an empty chair so the viewer could imagine themselves sitting there. Eventually, I decided on the romantic angle, so I needed a partner.
So now for the tricky part. Fiona, how would you like to get up in the middle of the night, carry furniture down a rough trail in the dark, and hang out in a mosquito-infested, tick-haunted, dew-soaked field?
Just kidding about it being tricky. She agreed without hesitation. Yeah, I owe her one.
Shot Planning
Since the shoot would occur before dawn, setup would take place in the dark, and any delay risked the rising sun spoiling the shot. So it was critical to plan every detail in advance.
The key elements in the sky covered 65° horizontally and 45° vertically. The field of view of a 24mm lens is 74° by 53° — just about right when allowing for a margin around the edges.
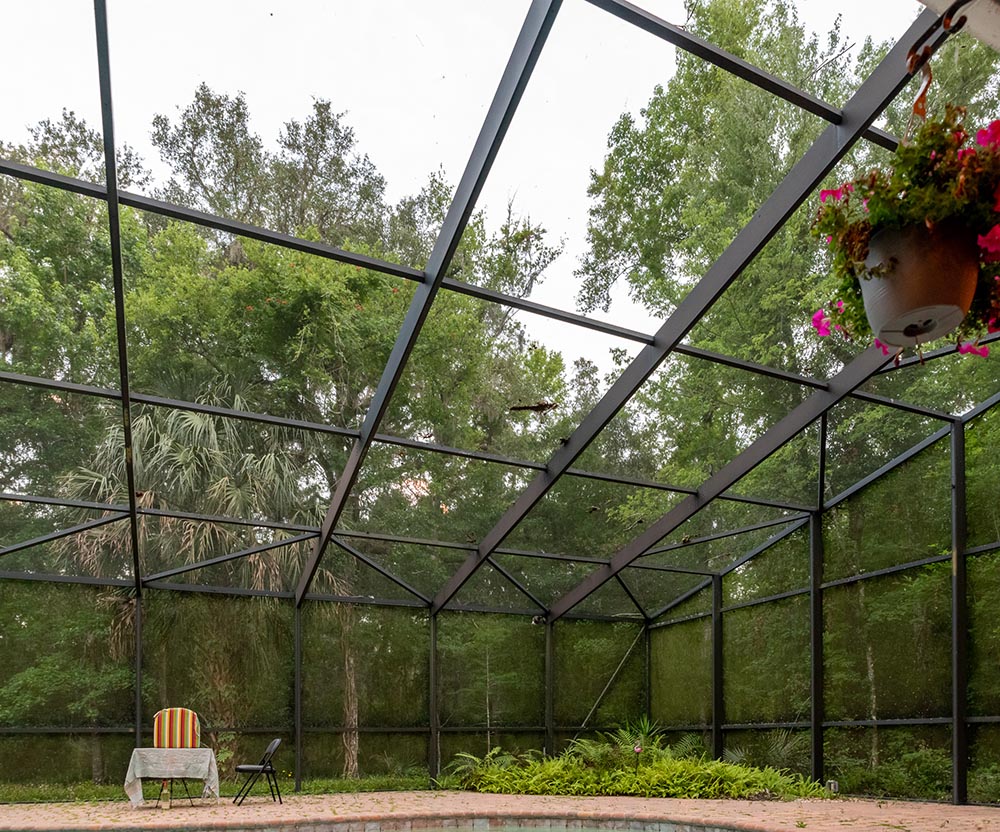
But the lens would be tilted up slightly, causing distortion that would give objects a noticeable lean. Look at the stripes on the pillow in this test shot. They should be vertical.
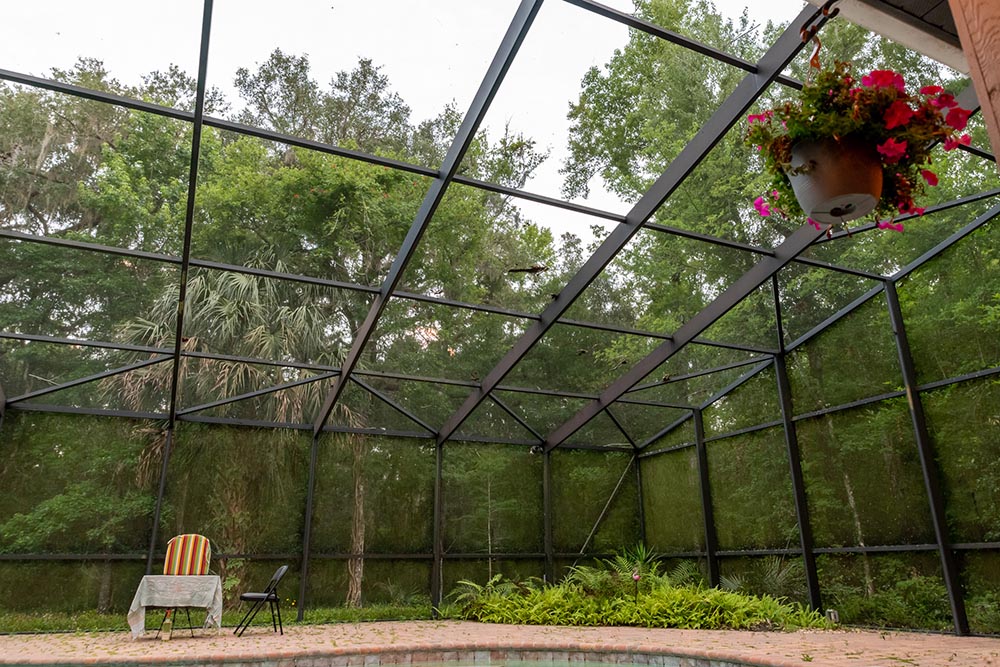
Adobe Lightroom can easily correct the distortion, at the cost of losing some pixels in the upper corners. See how the hanging flower basket is no longer fully visible.
To ensure I didn't lose Saturn during the distortion correction, I had to shoot at a slightly wider focal length. Based on some test, 22mm would work, so I chose the Nikon 14-24mm f/2.8 lens, mounted on a Nikon D850 camera, for this shoot.
I set up the props in the back yard and decided on the exact framing. The table would be 16 feet from the camera. I cut a piece of string to this length, an aid in quickly setting up the shot in the dark field.
I knew I'd be taking separate shots for the sky and for the ground — the dynamic range of the scene, ranging from the bright lantern to the dark night sky, would be far too wide for a single shot, even with a camera as capable as the D850.
The camera settings for the sky shot would have to be decided in the field, as they would depend on variable details such as light pollution and fog that are unknowable in advance. But for the ground shot, I could decide the settings now.
Normally, for a landscape shot, deciding the settings is straightforward — choose the lowest ISO (for minimal noise), a reasonably high f-stop (for depth of field), then use whatever shutter speed is required for proper exposure.
But this shot would feature people, and people are never perfectly still. In test, I found that a shutter speed of 1/20 second was the slowest I could get away with; any slower and there would be motion blur.
Also because people move, I needed everything that served as their background, from the grass near the table all the way to the big tree, to be imaged in a single shot. A depth-of-field calculator showed that f/4.8 would be sufficient to keep everything in focus.
I recreated the shot in a dark room, turned on the two lanterns, had Fiona sit at the table, and determined the ISO by trial-and-error. At ISO 560, her face was properly exposed.
We also did some posing test shots.
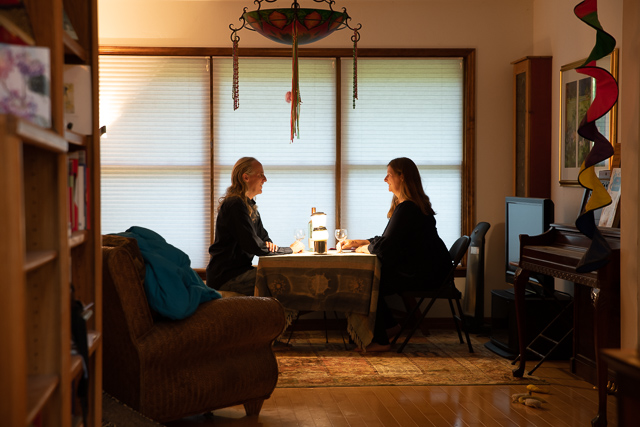
During these tests, we discovered that poses involving leaning our elbows on that flimsy prop table really did not work.
This detailed planning may seem excessive. But every simple task, so quick and easy in a well-lit studio, becomes ten times more difficult in the dark. A bitter legacy of failed shoots taught me the golden rule of night photography: whatever can be planned, should be planned. Always.
Field Shooting
With preparations completed on May 22, it was time to actually do the shoot. But there was a big problem: the weather. For weeks, conditions had been glorious for astrophotography. Warm dry days. Cool clear nights. But the pattern had changed, with nothing but clouds and rain in the forecast.
On the rare nights when the forecast was “partly cloudy”, I got up and checked the infrared satellite, only to find extensive clouds.
By late May, time was running out. Beginning June 3, the moon would start interfering with the shot (you need dark, moonless skies for Milky Way photography). And with the Florida summer rapidly approaching, by the time the moon was gone, there was a danger that the semi-permanent clouds of the wet season would have set in.
I began to worry that the shoot wouldn't happen at all.
From the weather forecast, the morning of May 31 looked to be the best (and possibly last) chance. Awaking at 3:30am, a check of the satellite showed only a bit of cloud cover — not too bad. I woke Fiona and we departed.
We drove through some dense fog on the way to the shooting location. That was worrisome. Too much fog would ruin the shot. But a small amount could be an asset, adding a touch of mystery.
On arrival, the sky was mostly clear, the fog low and scattered. Plus, the recent rain had brought forth some green growth and a few wildflowers. Conditions looked good.
I set up the camera, and we assembled the props. There was a lot of travel between the table and the camera, and we had to carefully take a wide path to avoid trampling the pretty grass.
The first shot was of the sky: 30 seconds at f/2.8, ISO 800. Then, I focused on the table and took a few shots of the lantern lighting up the grass, and used a flashlight to do some light painting on the tree.
Now, we waited for the coming dawn to brighten the meadow a bit. Once the exposure was balanced, I set the camera to my pre-determined settings (1/20 second, f/4.8, ISO 560), then put it into intervalometer mode, where it took photo after photo, every half second. I then ran to join Fiona at the table.
We tried to relax and forget the camera. We toasted glasses. We joked. The goal was to get some natural, unforced expressions. In total, there were 391 shots taken over about 3 minutes.
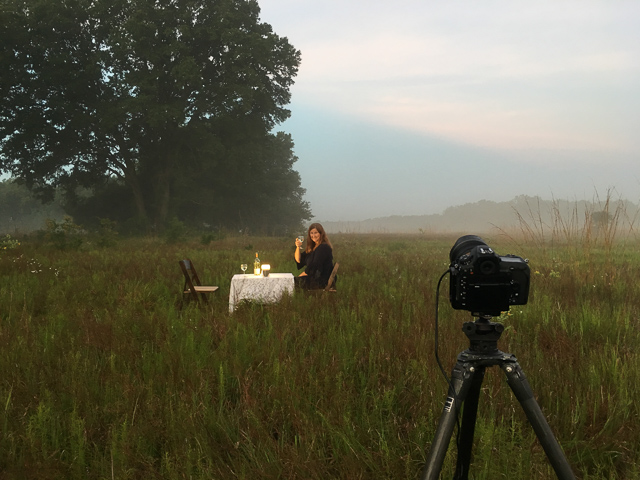
After the sun rose, I took this iPhone snapshot of the site.
Digital Editing
Back in the studio, the photos were imported into Adobe Lightroom.
First, I selected the photos where Fiona and I had the best expressions. These turned out to be different exposures.
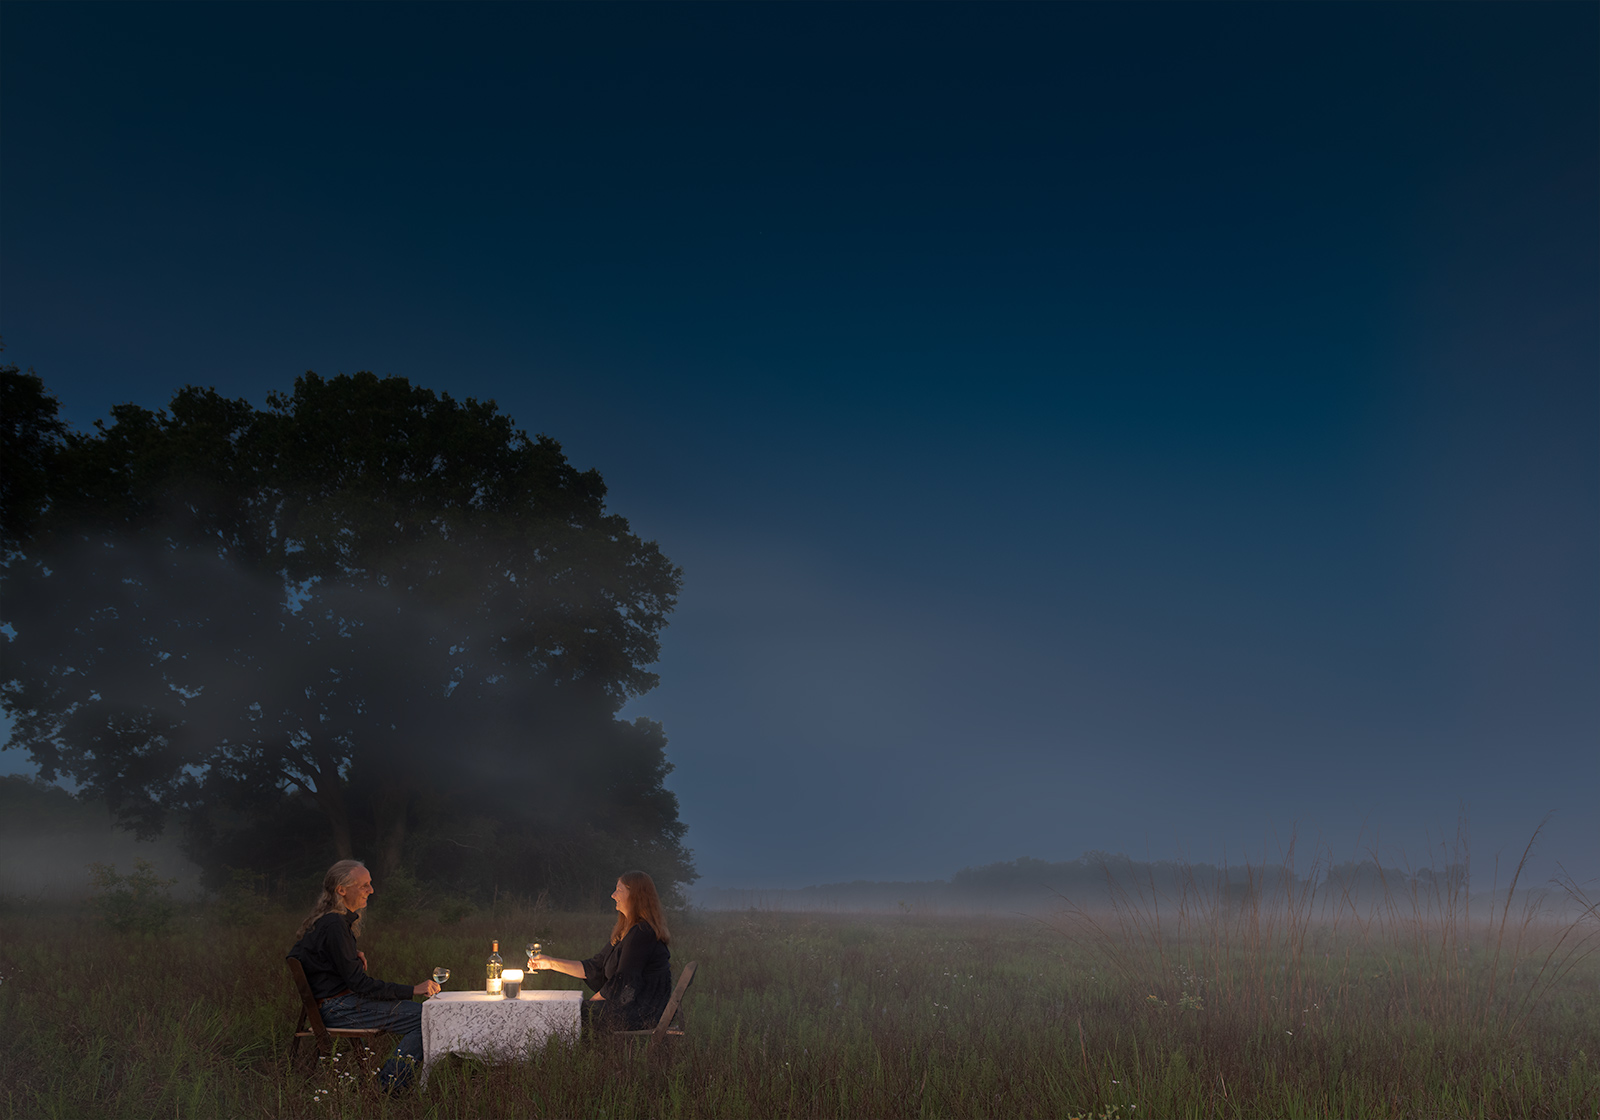
The final image was a composite of five exposures:
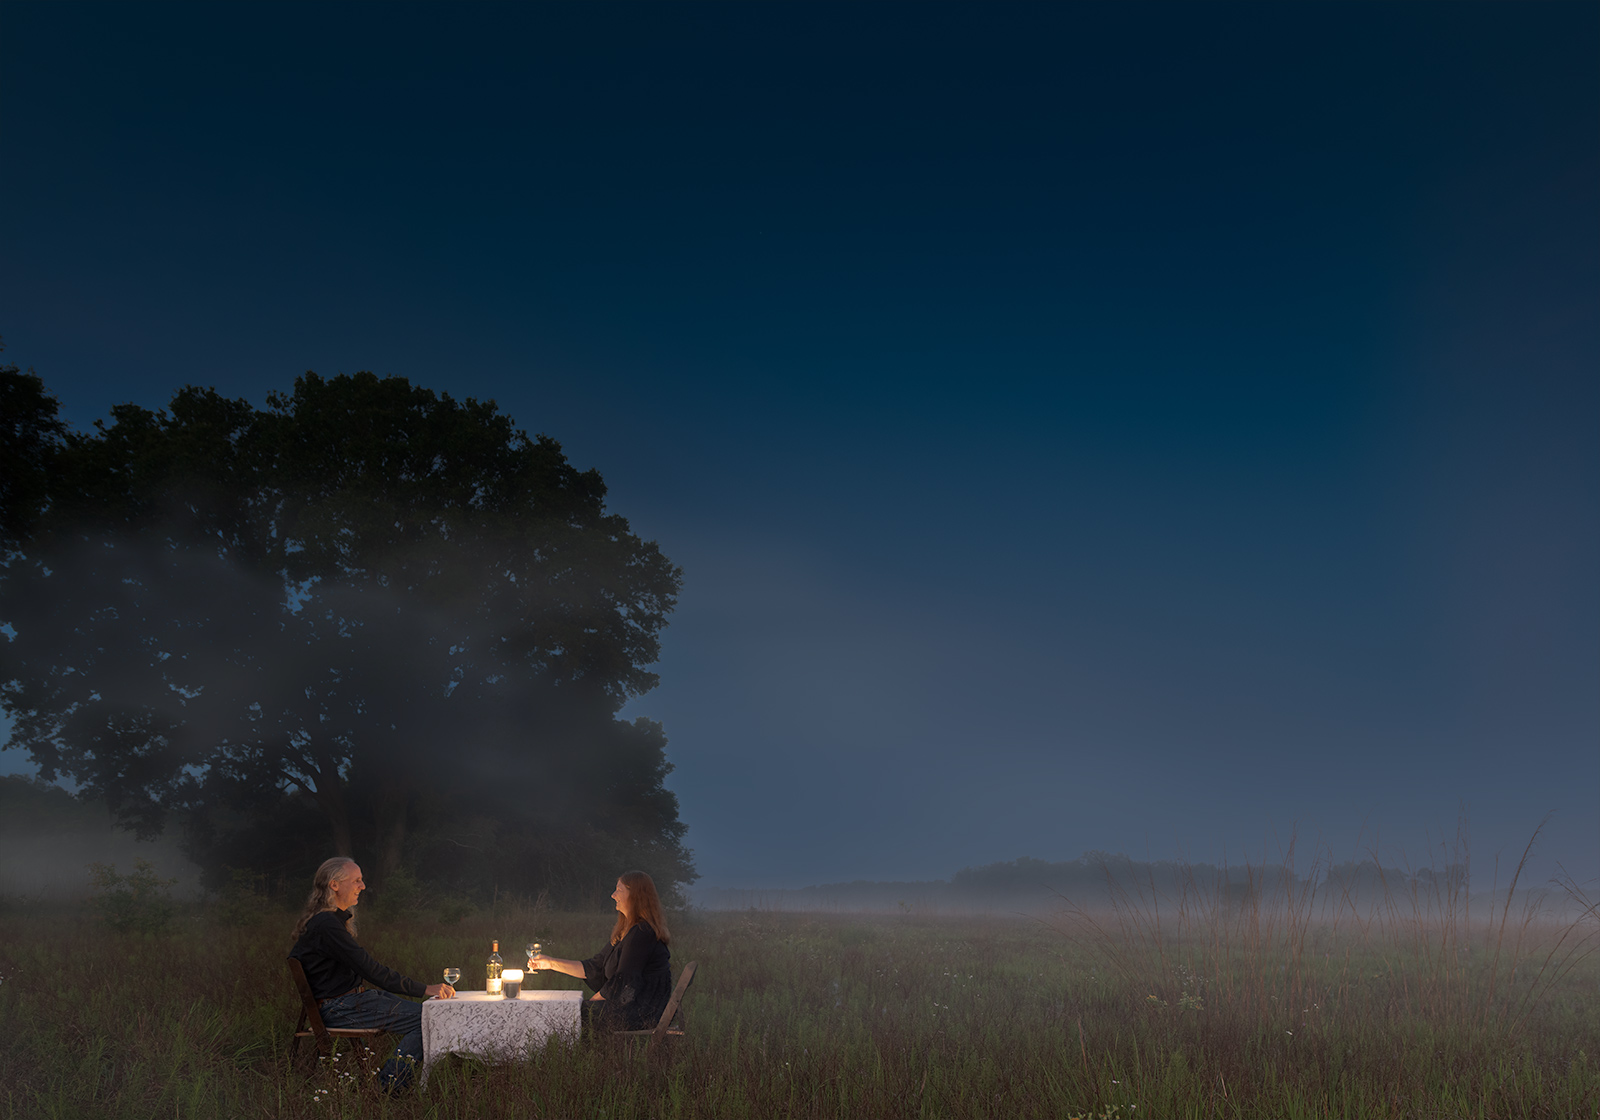
- Fiona, along with the ground — trees, grass, table — and the background color of the sky. This was the master exposure, to which the other elements were added.
- Myself, along with my wine glass and a bit of table and grass near me.
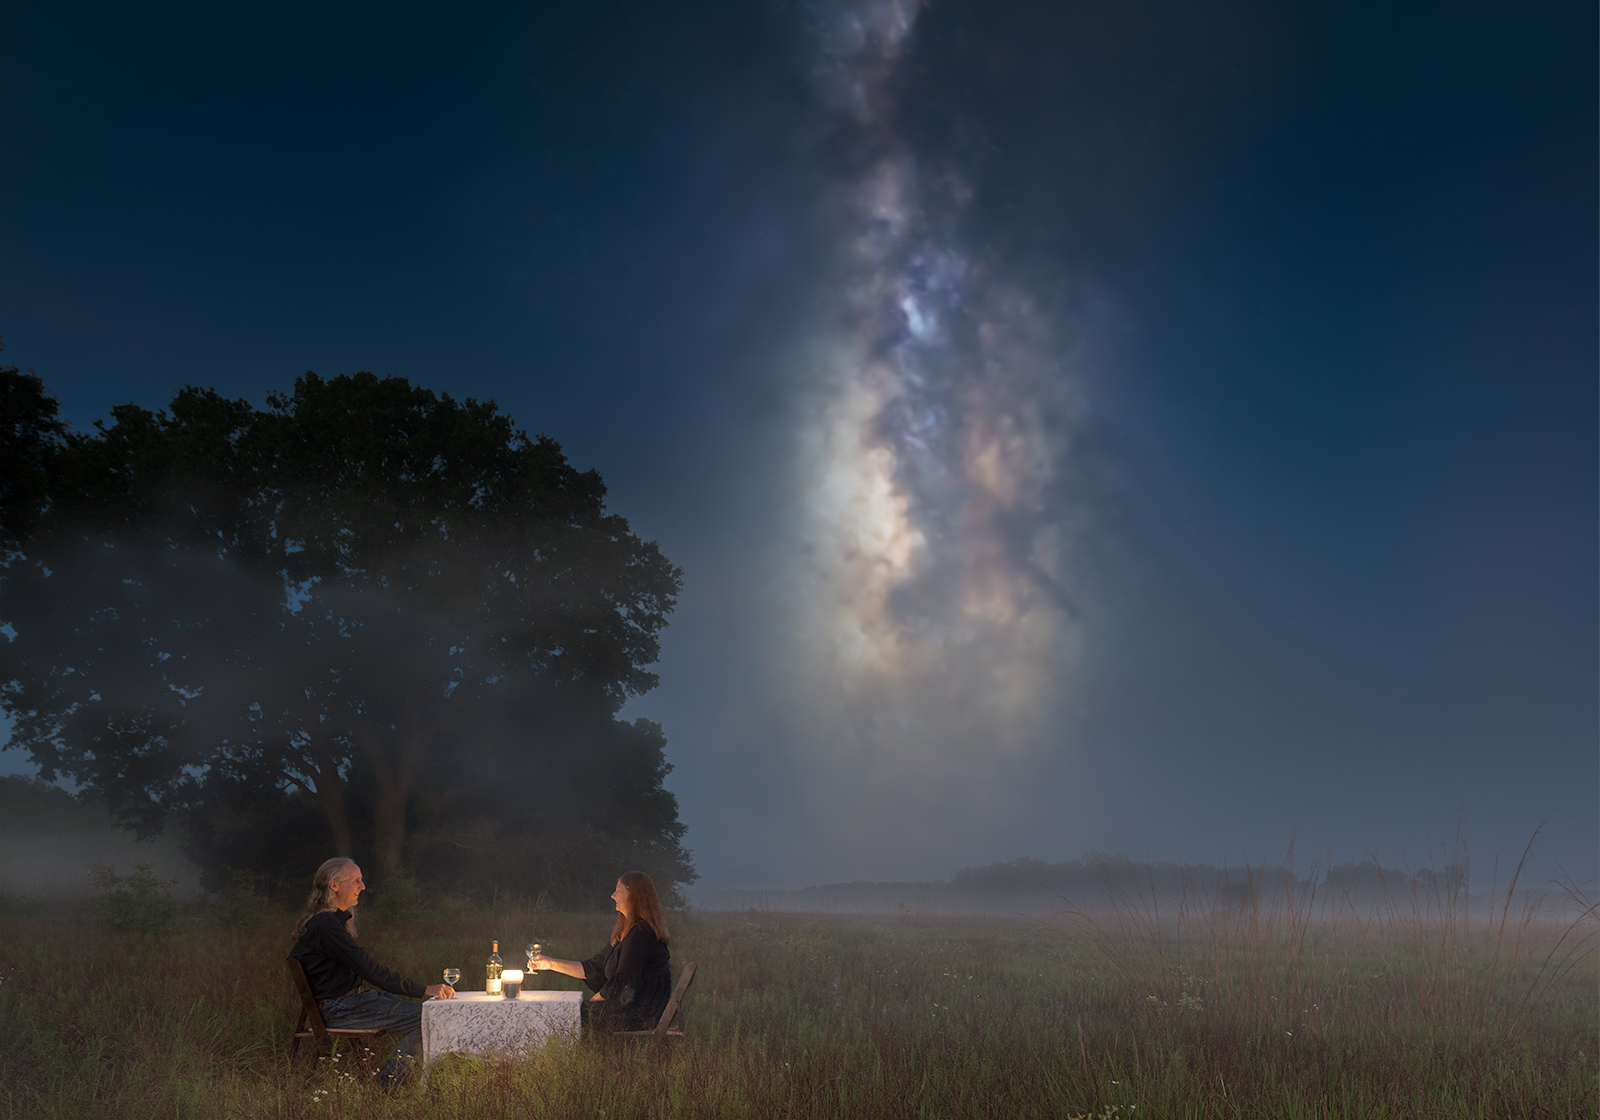
- The stars and Milky Way.
- The lantern light falling on the grass.
- Light painting of the big tree.
Each exposure was given some basic editing in Lightroom (including white balance and distortion correction). They were then combined using Adobe Photoshop. I started with the master exposure.
Recall that this photo was taken after the approaching dawn had lightened the meadow a bit. This had also lightened the sky, hiding the Milky Way and dimming the stars. Frequency separation — an image processing technique where regions of an image are selected based on the brightness difference between adjacent pixels — was used to completely remove the remaining stars, leaving a smooth blue background to which the Milky Way and stars from the earlier exposure would be added later.
In the master image:
- harsh shadows on Fiona's face were softened.
- a bit of flare was added to the lantern globe.
- the sky was darkened a bit.
The image of myself was then merged with the master using a feathered mask. In this exposure, harsh shadows on my face were softened, and the overall exposure of my face was raised to be closer to Fiona's.
Subtle flares were added to the wine glasses, and a bit of air glow was added over the table.
The exposures of the lantern lighting up the grass and the light painting of the tree were then added. These exposures were overlaid using Photoshop's Screen blending mode.
The exposure of the night sky was then loaded in Photoshop, and frequency separation used to separate the stars and the Milky Way into their own layers. Each was then processed independently.
Heavy noise reduction was applied to the Milky Way, followed by a high-radius, low-intensity Unsharp Mask filter to increase the contrast. It was brightened using a curve layer, then added to the final image using the Screen blending mode.
The stars were processed by modest noise reduction and moderate sharpening. They were then added piecemeal. On top of the base layer of dim stars, successively smaller numbers of the brightest stars were selected using the StarSpikes plugin and given successively larger flares. Jupiter, Saturn, and Antares were each processed on their own. The dimmer and brighter stars were added using the Lighten and Screen blending modes, respectively.

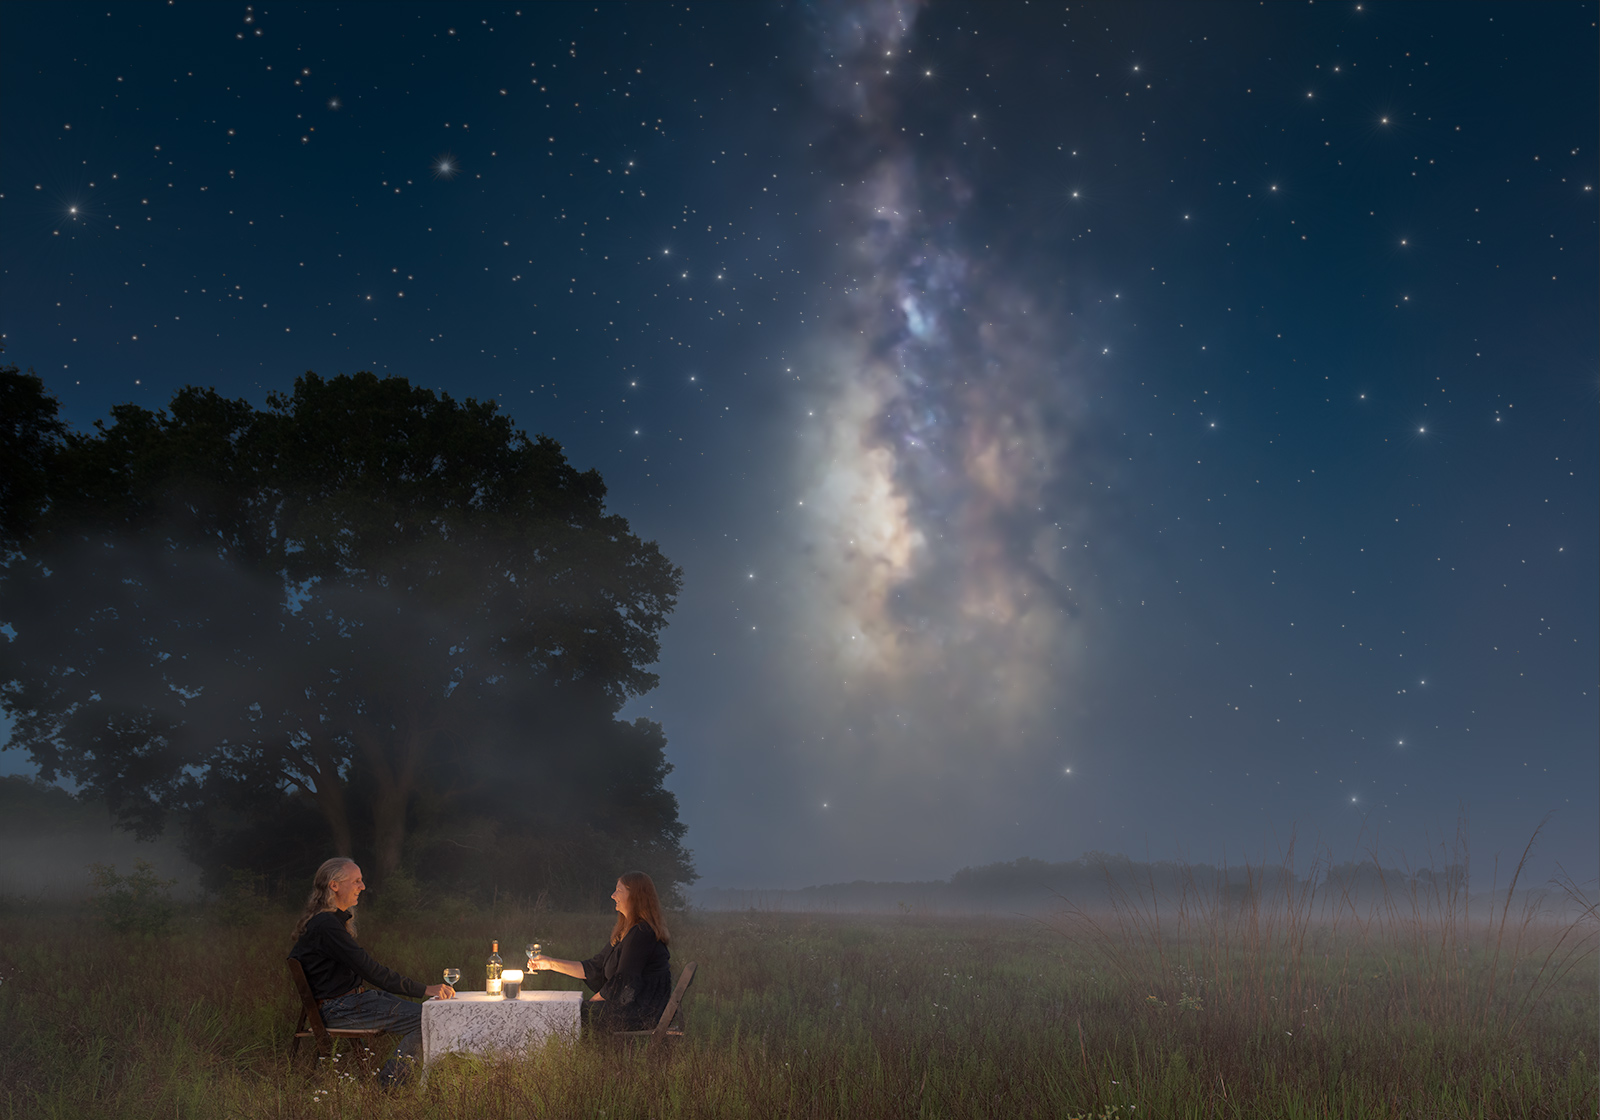

A copy of the merged image was processed using the Orton effect, then overlain at a low opacity with a gradient mask so only the lower portion of the image was affected. This enhanced the misty, ethereal mood.

Finally, back in Lightroom, adjustments were made to the tone curve and saturation. It's easier to add contrast and saturation than to remove it, so I'll typically leave the Photoshop file slightly flat and desaturated. Then I'll create virtual copies for each usage (online viewing, printing, etc.) and perform the final usage-specific contrast and saturation boosts in Lightroom.
Print Proofing
I printed a small-scale proof in my studio using a Canon iPF8400 printer. Based on the proof, the saturation of the blue sky was bumped up, and the brightness of the lower part of the image was increased a bit.
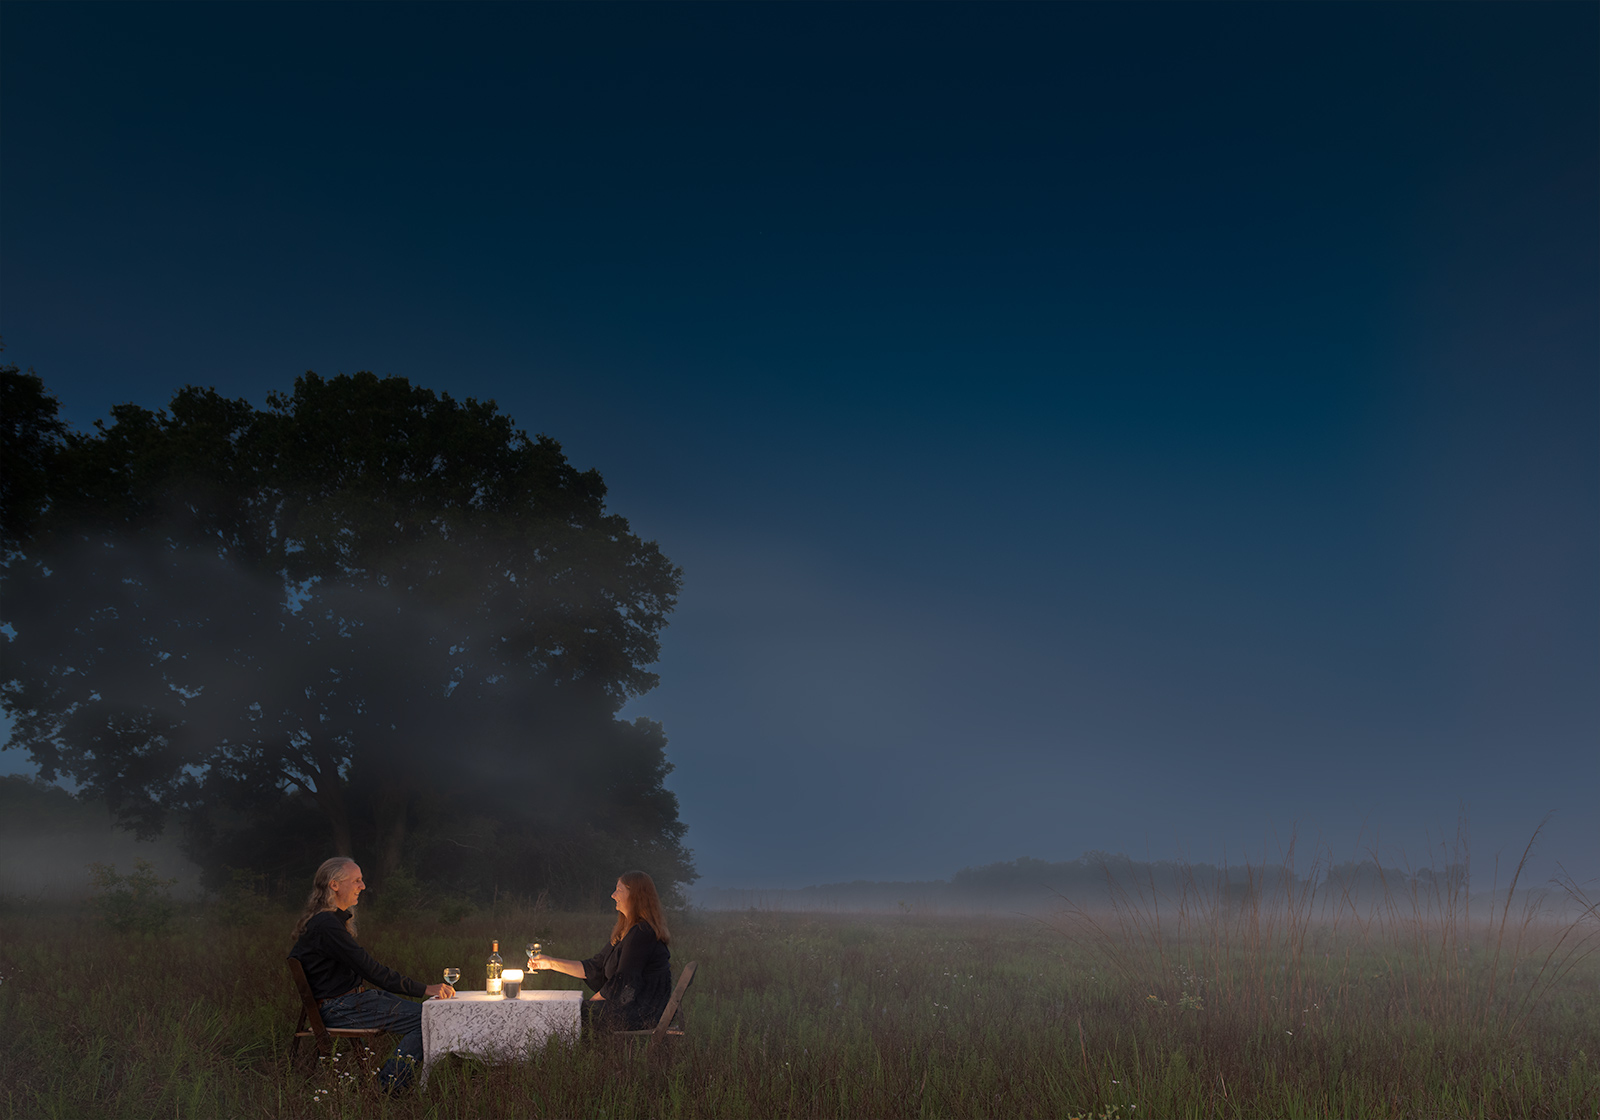
Then, a full-size proof, 3 feet wide, was printed and hung with magnets on a steel blackboard in our living room. This is always my final step in creating a fine art print — hang it on the wall and live with it for a while.
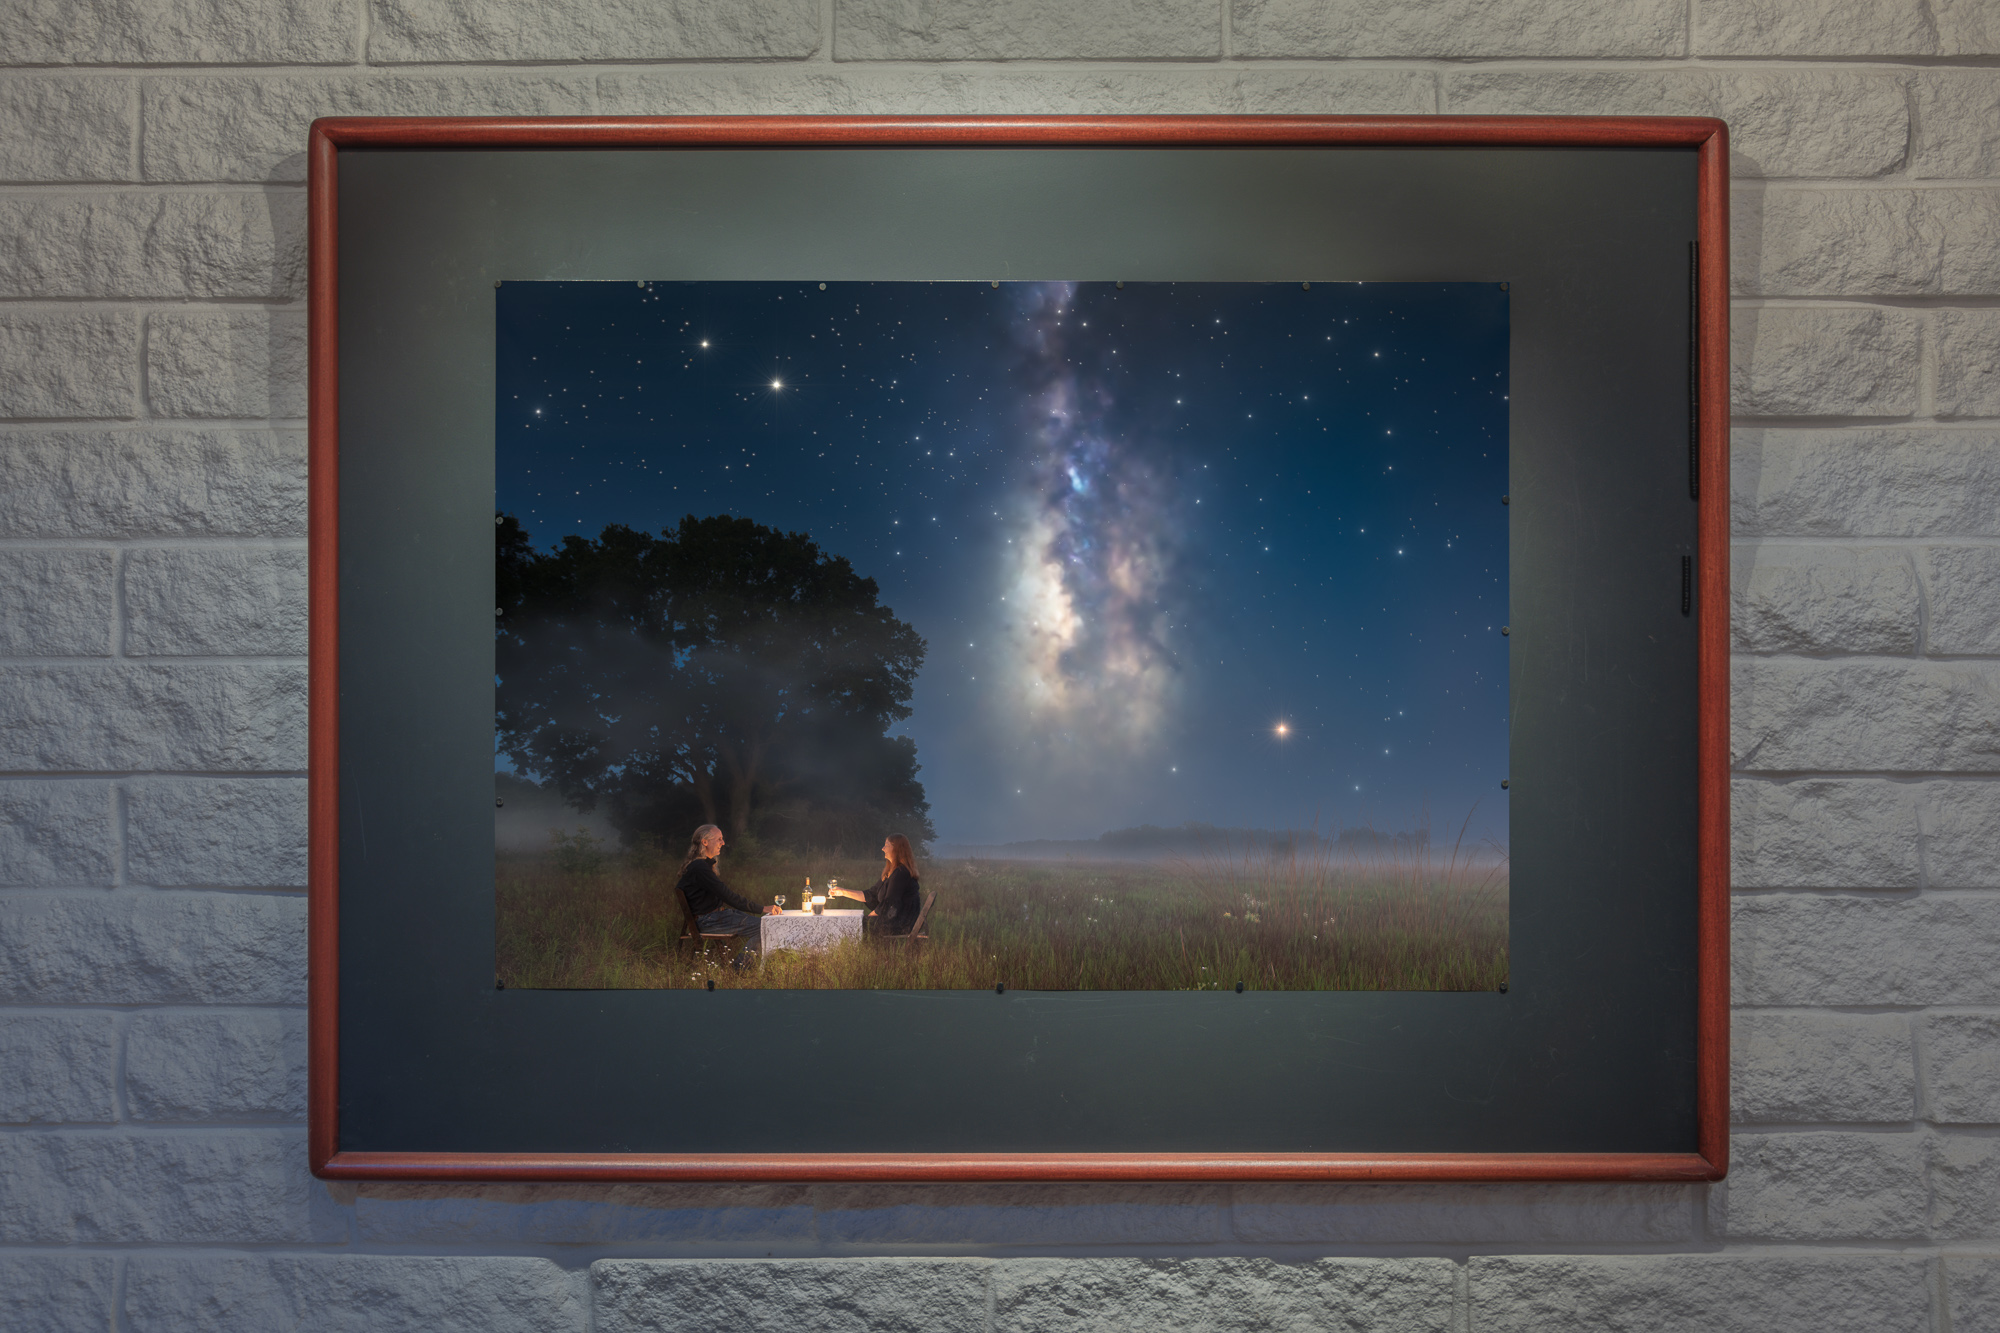
I'll often noticed flaws after a few days that I initially overlooked. But in this case, I only made one change: dimming a small clump of brighter grass that was leading the viewer's eyes out of the print.
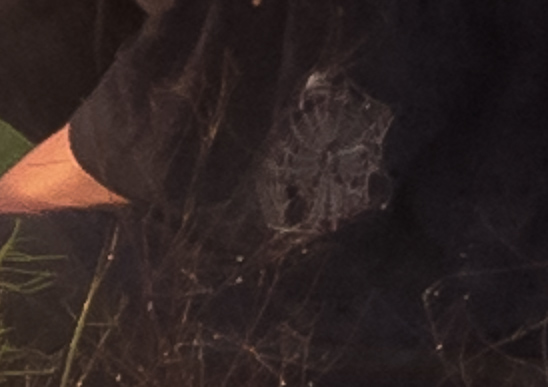
I find that after a few days of living with a print, I'll also noticed new details, such as this dew-covered spider web in front of Fiona's arm.
Now you know the story behind “Table for Two”. It was around six weeks from the initial idea to the completed print. Hope you enjoyed this behind-the-scenes peek at how the process unfolded.